B2B Lead Generation Services
Helping technology marketers reach the right buyers, generate demand, and drive pipeline.
Explore All →


Who We Serve
Helping technology marketers connect with the right buyers in competitive markets.
Explore All →


Want to learn vSphere? Test vSphere? Prepare for your VMware Certified Professional (VCP) certification? Running VMware vSphere inside a local desktop hypervisor such as VMware Fusion or VMware Workstation is the best way to do it. By running vSphere in Fusion, you won't need an expensive server that takes up space, eats power, and makes noise. Plus, you'll have great flexibility with a virtualized vSphere virtual machine so that you can clone as many vSphere VMs as you want, build virtual private lab networks, virtual storage, and do it all on your existing desktop or laptop computer. Read this article to learn how to do it, step by step.
When we are done, here's what it will look like:

Figure 1 - VMware vSphere Running in VMware Fusion
But first, why are we doing this?
If you need additional justification as to why you need a virtual vSphere lab, here's why:
[I wish we had some cool counting numbers here to make this more visually appealing]
So how do you do it? Let's find out.
To virtualize vSphere inside VMware Fusion, let's first make sure that you've met all the requirements so that we know this will be successful, even before we start. Here are the requirements you need to fulfill:
The official VMware requirements for VMware Fusion can be found here.
I'm going to assume that you have already or can install VMware Fusion by yourself. Honestly, the installation for Fusion is no different than installing any other Mac OS application. If you need help or some tips, VMware has a nice KB article on installing Fusion that includes a video.
With the requirements met and Fusion installed, we can create what will be our vSphere virtual machine. To do it, open Fusion and press command-N, or go to File -> New. This brings up the new Virtual Machine Assistant.
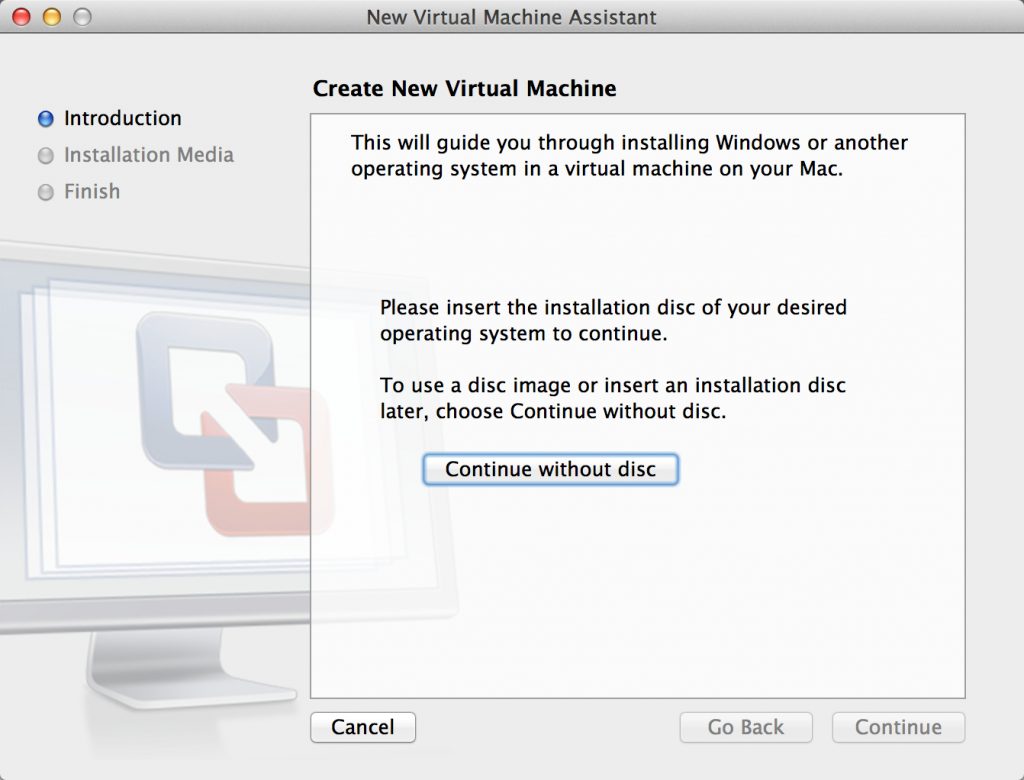
Figure 2 - VMware Fusion New Virtual Machine Assistant
The New Virtual Machine Assistant first asks us to either insert an operating system disc or continue without a disc. In the case of vSphere, you'll just click Continue without disc (unless you want to burn ESXi to a DVD and put it in your computer).
Now, select the VMware vSphere ESXi ISO file that you downloaded from VMware as the Operating System / Installation Disc and click Continue.
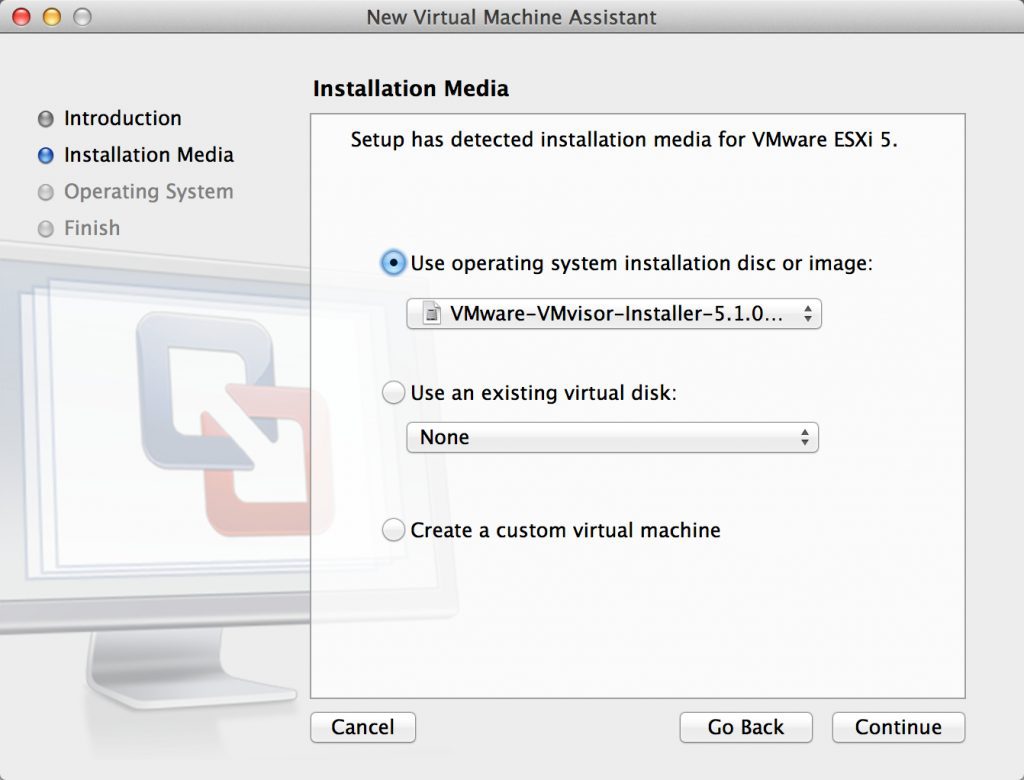
Figure 3 - Selecting the VMware vSphere ISO Image
Thankfully, VMware Fusion 5 and up (which is what this post is based on) supports running vSphere as a virtual machine and there is no painful editing of the virtual machine configuration file (the VMX file) to fool it into working. As you can see from the graphic below, Fusion learns that we are wanting to install VMware ESX from the ISO we provided and defaults to that virtual machine guest operating system type.
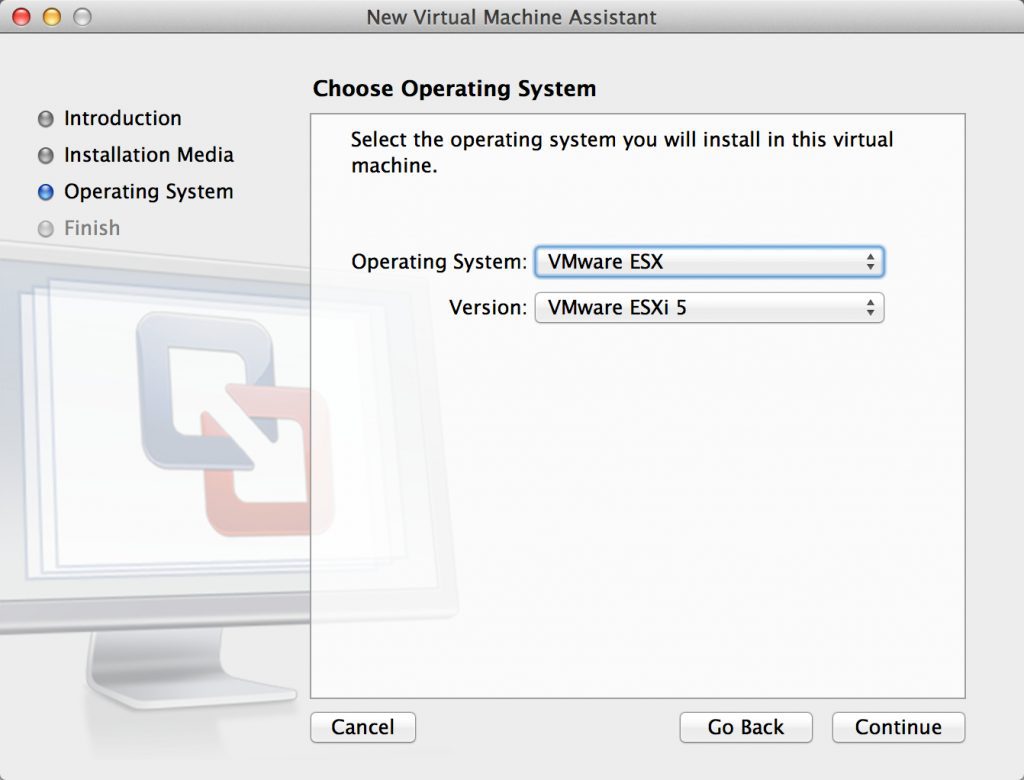 Figure 4 - Specifying VMware ESX as the Guest OS Type
With VMware ESXi 5 selected as the guest OS type, click Continue.
Now you get to review the virtual machine you are about to create. As you can see, it defaults to 2GB of memory, a 40GB virtual disk file, and to use NAT virtual networking.
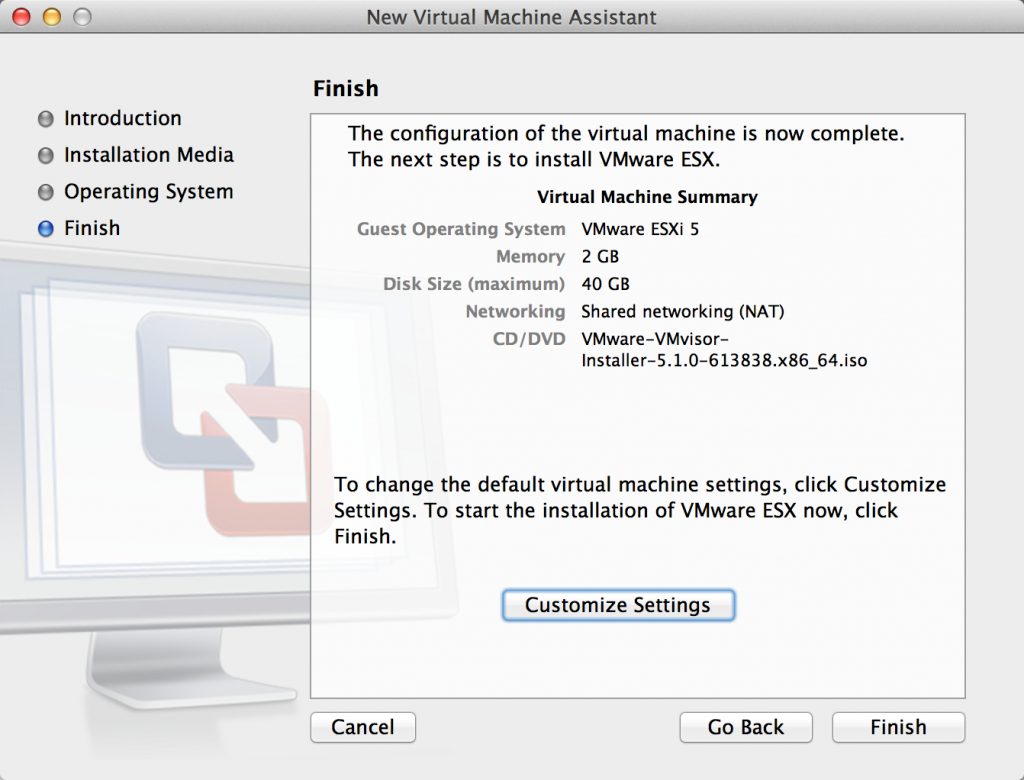
Figure 5 - Final Review of the New VMware ESXi Virtual Machine
If you plan to run nested virtual machines inside this virtual ESXi VM then I recommend that you use the Customize Settings option to increase the memory of the VM to something like 4GB and the virtual disk size of the VM to somewhere around 100GB (unless you will store the virtual machines on shared storage). When done reviewing, click Finish.
You'll be prompted to name the virtual machine but you can take the default of VMware ESXi 5 (in this case), and click Save.
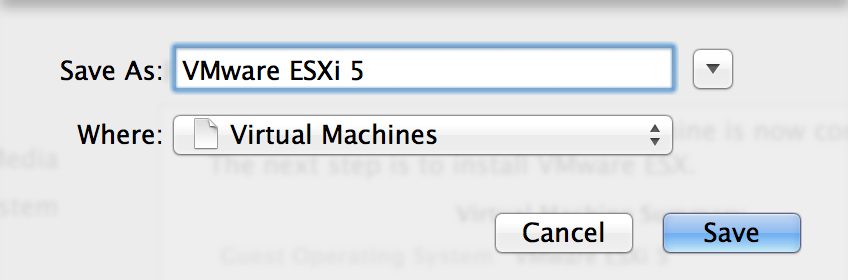
Figure 6 - Saving the New Virtual Machine
Upon saving, Fusion will start booting the new virtual machine from the ISO file.
Now the VMware ESXi installation process begins. You'll see the following two screens fly by as VMware ESXi goes through its boot process.
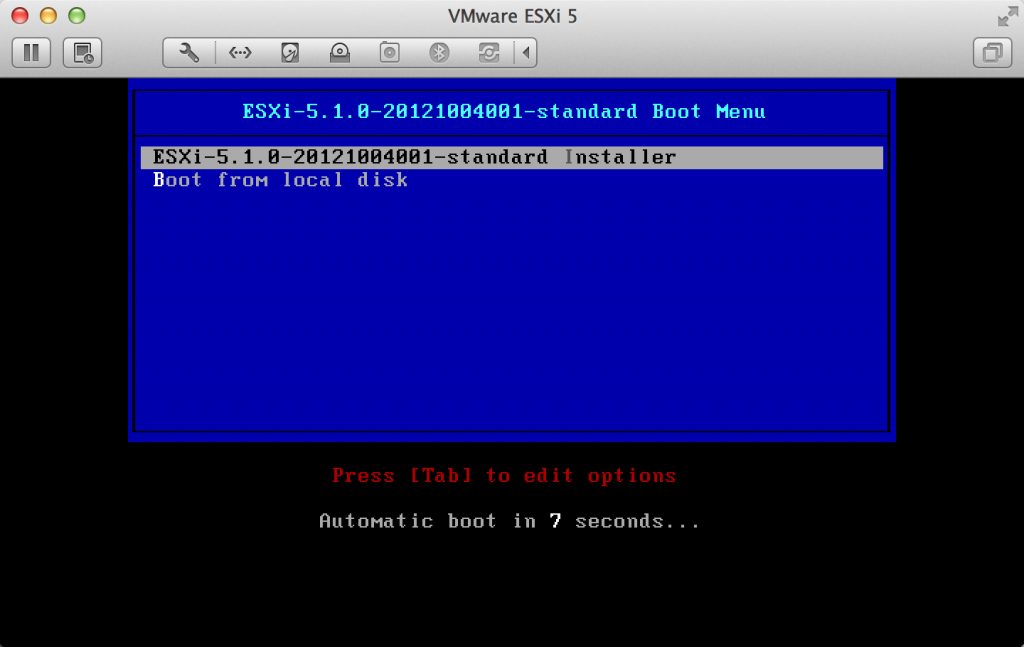
Figure 7 - The VMware ESXi Booter
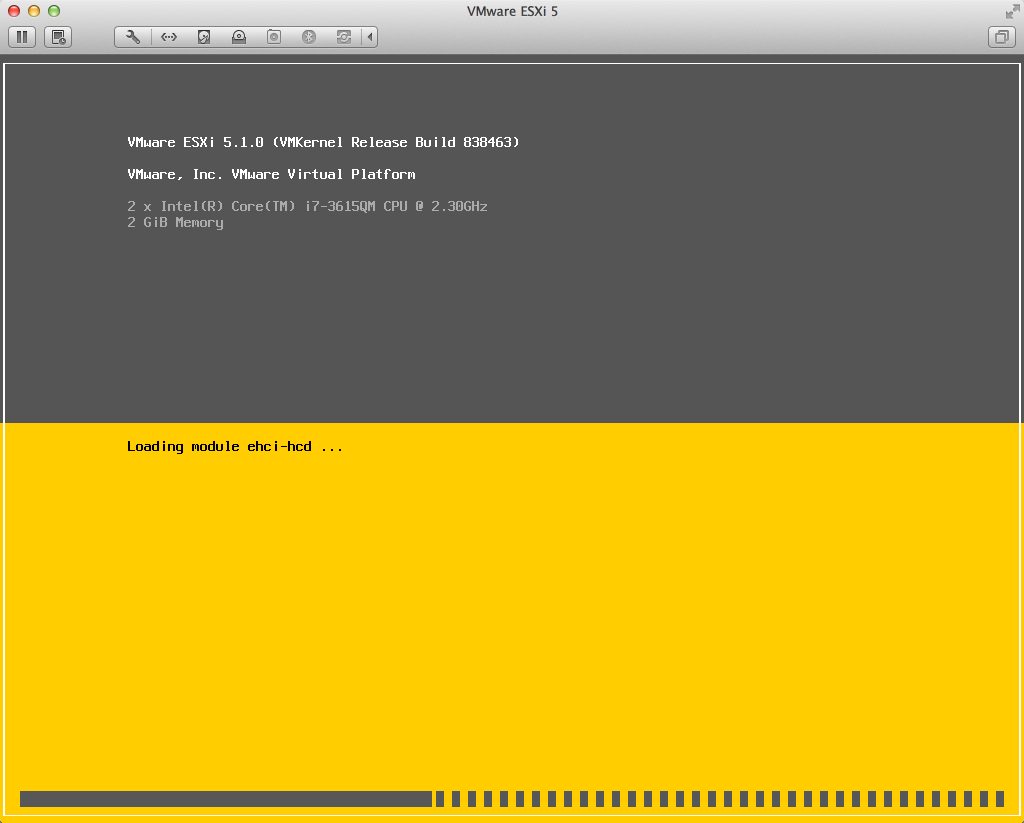
Figure 8 - The VMware ESXi Startup
Once booted, the "Welcome to the VMware ESXi 5.1 Installation". Press Enter to continue.
Remember - because you don't have VMware Tools installed on this VM, if you click your mouse on the console your mouse will be "locked".
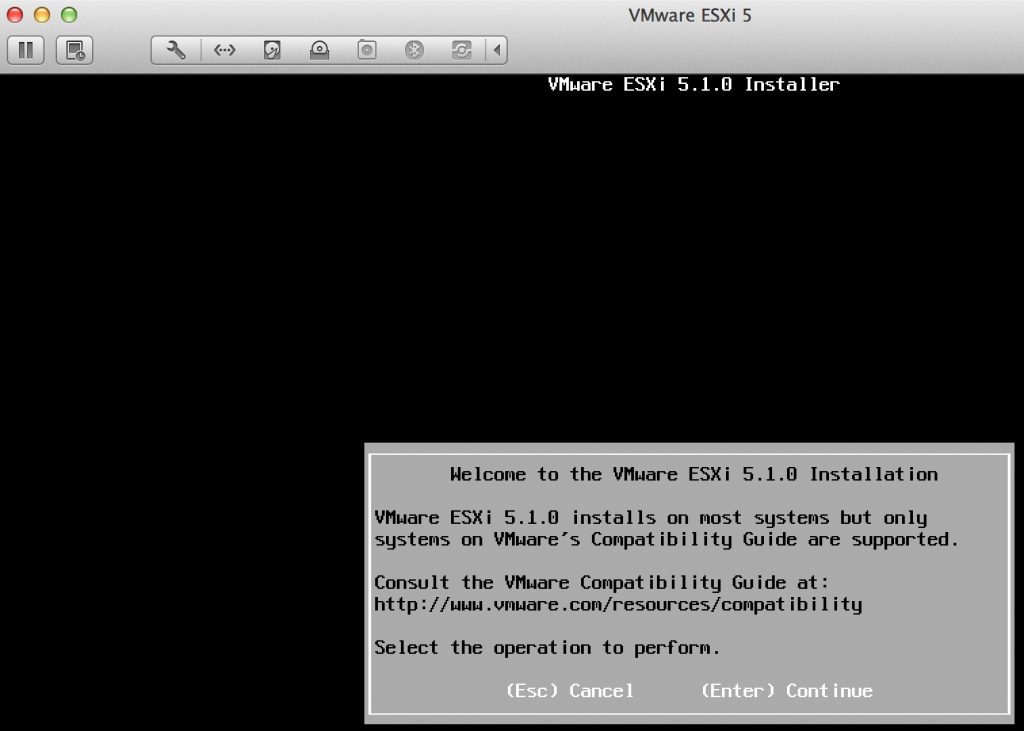
Figure 9 - Welcome to the VMware ESXi Installation
To release your mouse from the virtual machine, how down Control and push Option/Alt (at least on a Macbook Pro keyboard). However, to answer the installation questions, you'll need to click on the console window and lock in your mouse.
Next, presses the Enter to select the default disk for installatino, which correlates with the 40GB virtual disk we created for this virtual machine in Fusion.

Figure 10 - Selecting an ESXi Installation Disk
Next, select your keyboard layout. In my case that was the default of US English. Press Enter.
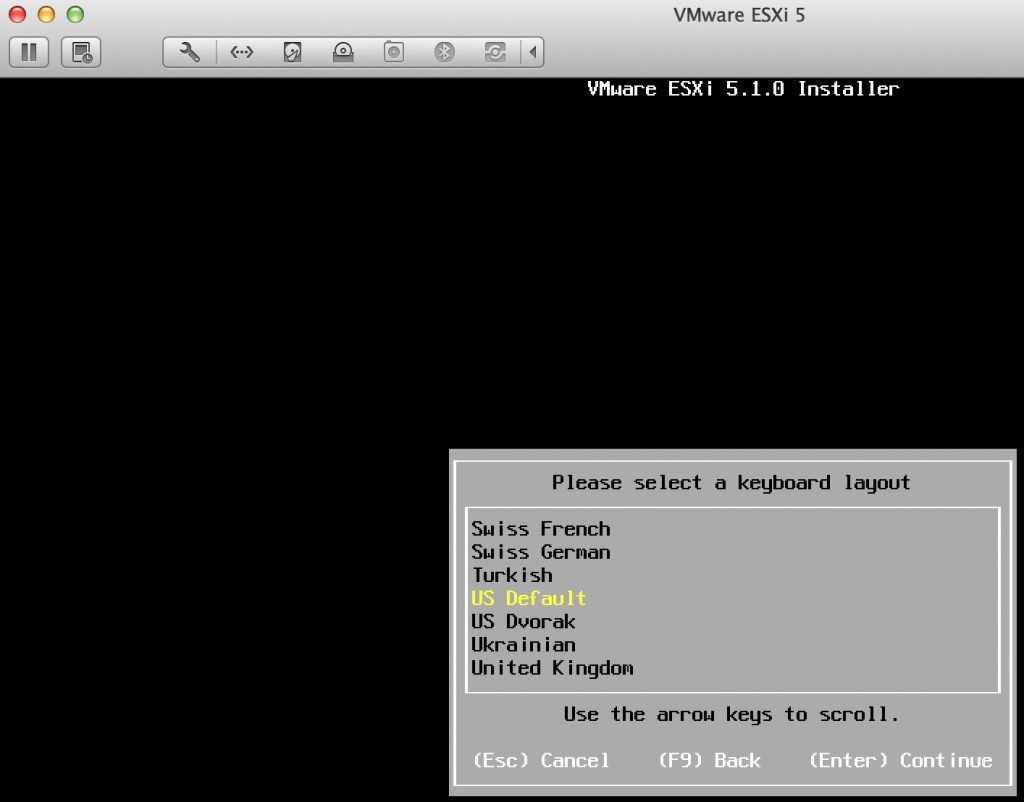
Figure 11 -Selecting the Keyboard Layout
Next, enter the root password, making sure that you meet the minimum requirements, and press Enter.
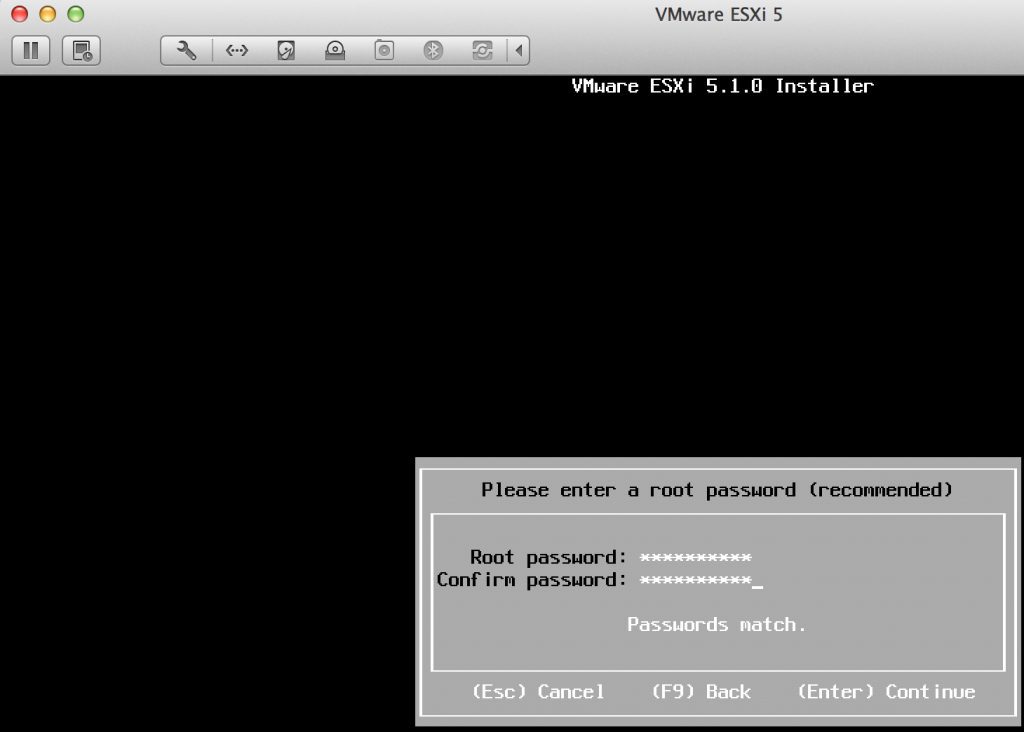
Figure 12 -Entering the Root Password
Finally, confirm that you want to install with these parameters by pressing F11. On a Macbook Pro keyboard you'll have to press Fn-F11 or else just F11 will turn down the audio volume.

Figure 13 -Confirming the VMware ESXi Installation with F11
You should see that the ESXi installation has begun and a progress bar. On my Mac, it took under 2 minutes (maybe even 1 minute) to complete the install. When done, you should see this message - that the installation was successful! Now, press Enter to Reboot the ESXi VM.
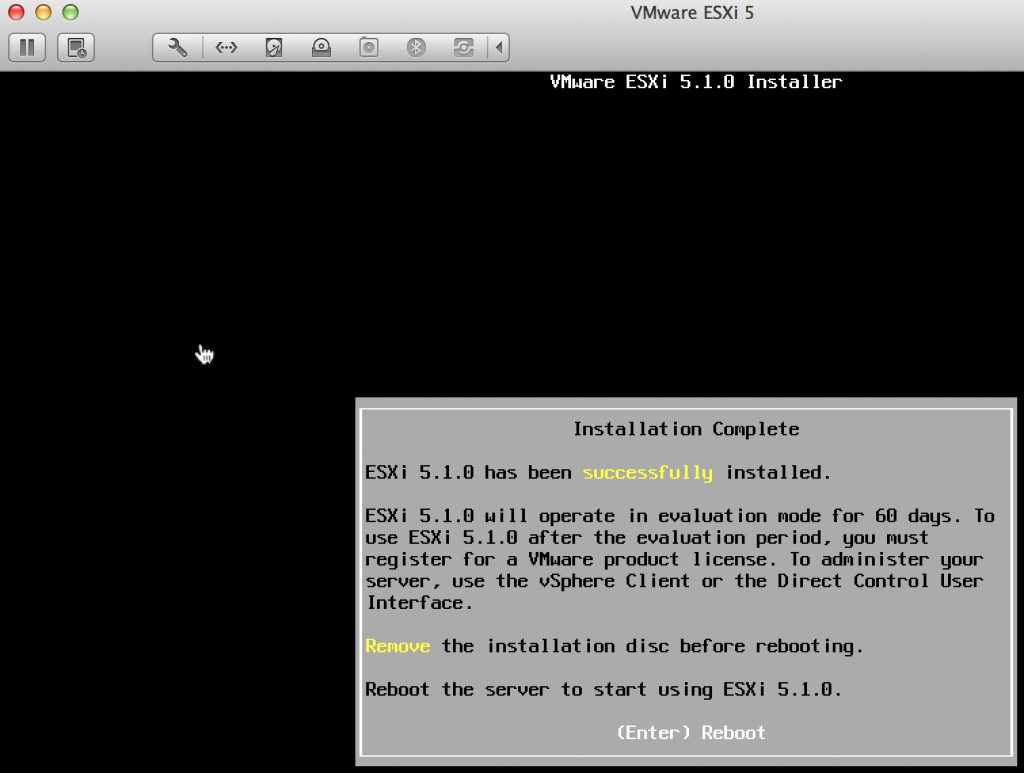
Figure 14 -ESXi Installation was Successful, Press Enter to Reboot
Once the reboot is completed, you should see the VMware ESXi console screen as shown in Figure 1 of this article. To login, press F2, which is Fn-F2 on a Macbook Pro keyboard. From here, you'll login as root with the password you created when you performed the installation (note that no longer is the root password blank/empty as it was in vSphere 4).

Figure 15 -Logging into VMware ESXi console
Once logged in, you'll be in what VMware calls the Direct Console User Interface, or DCUI. It's in here that you can configure networking, allow SSH login to the console (local or remote), view system logs, or set the ESXi server back to its default configuration.
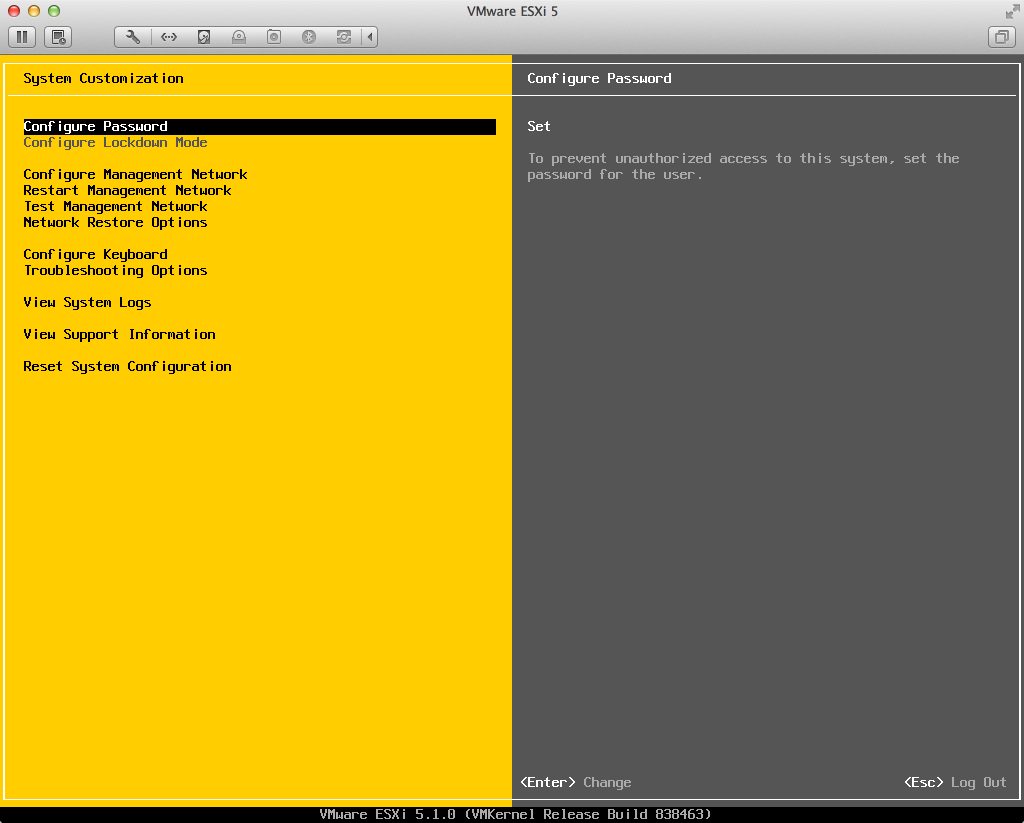
Figure 16 -The VMware Direct Console User Interface (DCUI)
At this point, you already have a functional VMware ESXi server. This server/VM has, by default, an IP address that is shared with only your Mac running VMware Fusion. In the case of our VM, we can see that the IP address is 172.16.126.128 (shown in Figure 1 and 14). You can connect to this IP address using you local web browser on your Mac, shown below.
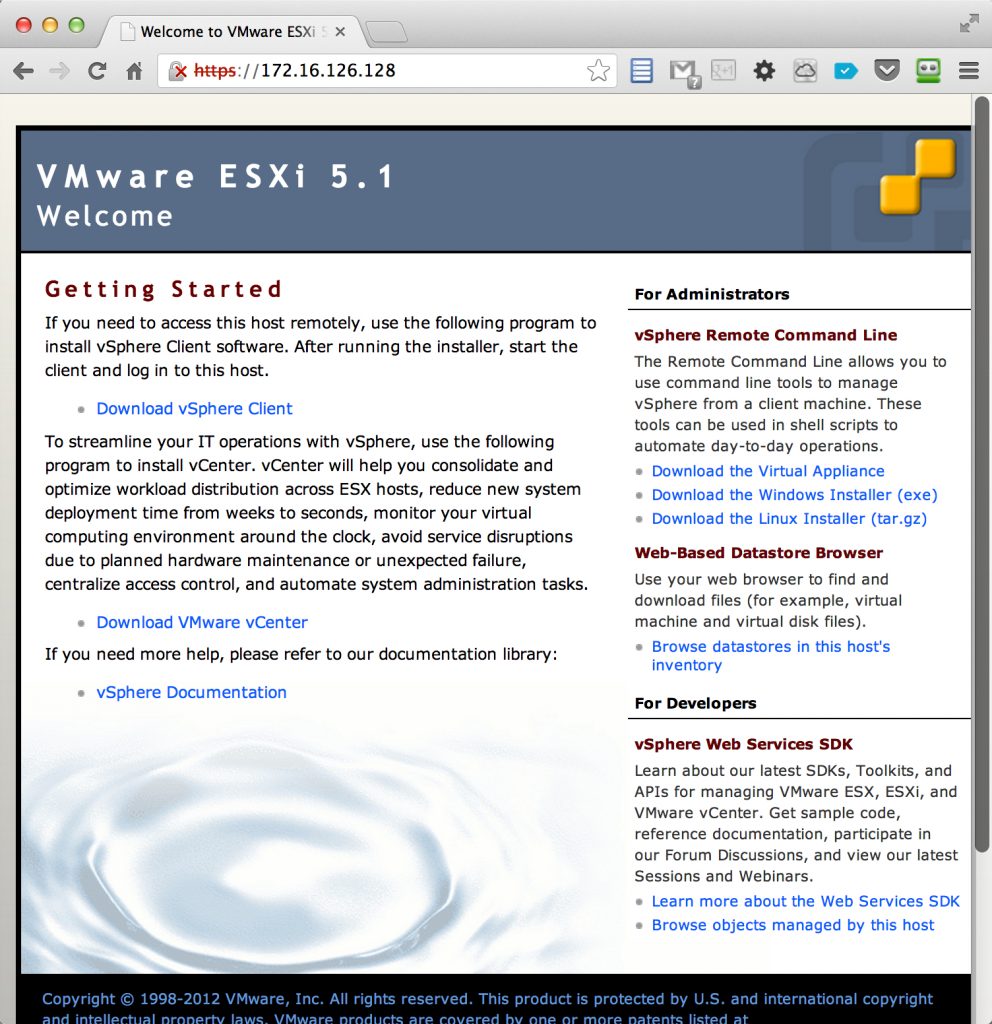
Figure 17 -Connecting to the VMware ESXi VM with a Web Browser
However, the VMware vSphere Client that can be downloaded from the web interface in Figure 17 will only run on the Windows OS. Thus, to administer this VMware ESXi server from a Mac you have two options.
In my case, I already had a Windows 2012 Server running as a VM in Fusion (configured on the same NAT network). I accessed the web-based interface for the VMware ESXi server we created, then downloaded, and installed the VMware vSphere Client for Windows.
From the vSphere Client for Windows, I connected to the IP address of the VMware ESXi VM, logged in as root, and used the password we created during the installation. You can see what it looked like in Figures 18 and 19.
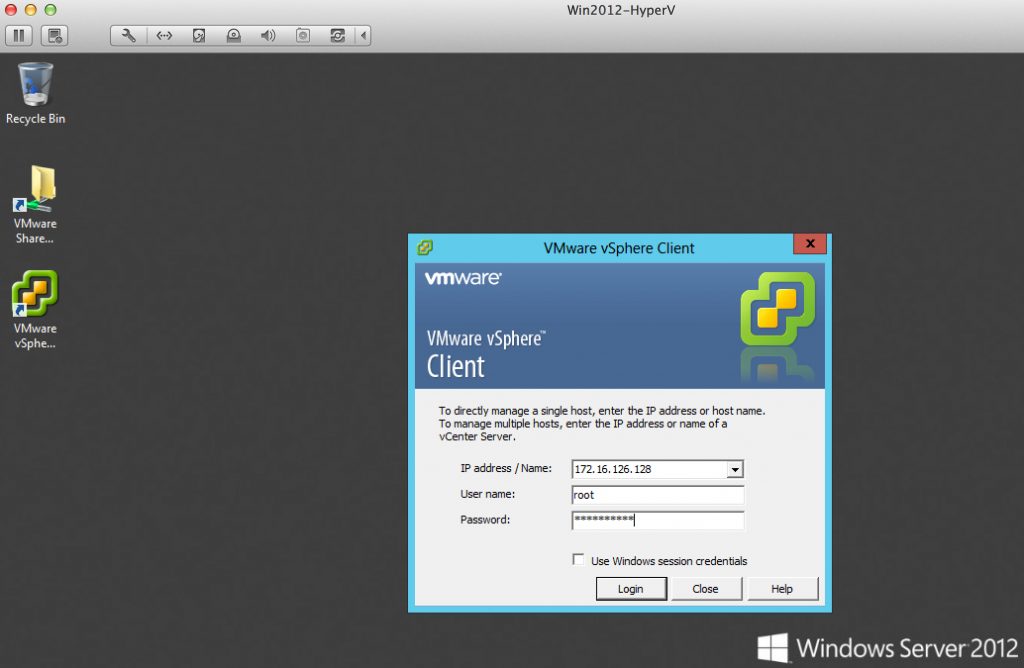
Figure 18 -Logging into ESXi from the Windows-based vSphere Client
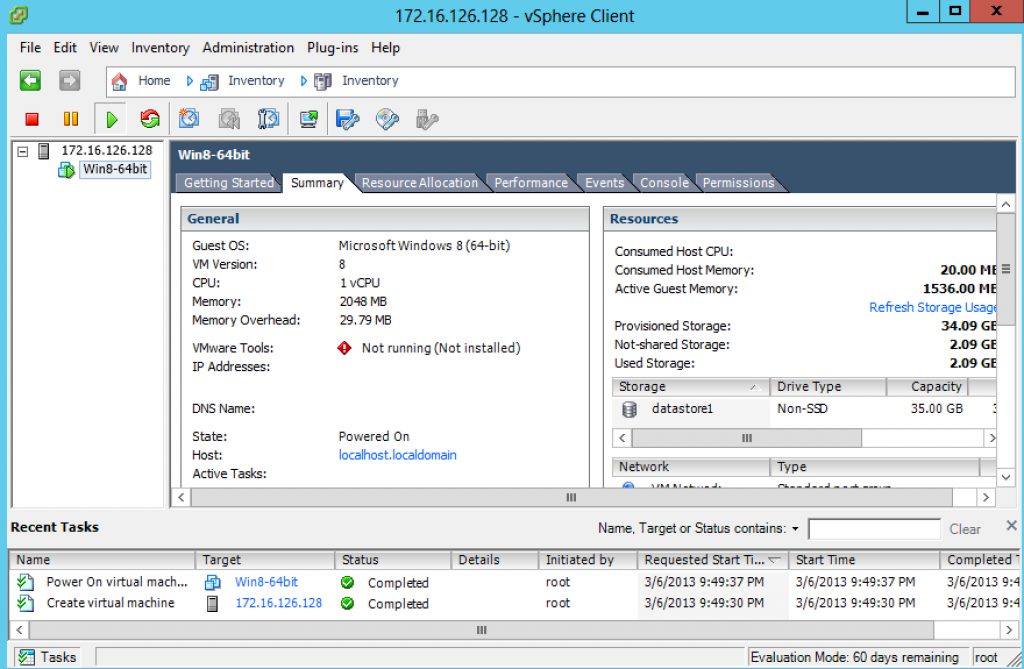
Figure 19 -Managing the VMware ESXi VM from the vSphere Client in Windows
As you can see in Figure 19, I am able to run a 64-bit virtual machine, nested, inside the virtualized VMware ESXi Server (Windows 8 in this case). So what are the next steps? From here, you could:
You should note that the IP address we are using is only accesible from the Mac you are running ESXi on or a VM running on that Mac (which is what we did). If you want to access the ESXi VM from a server or desktop outside of your Mac, you'll need to change the networking on the Fusion VM running ESXi to use Bridged networking and Renew the IP Address on the ESXi VM so that it will have a local IP address on your network. From there, you could access it from any machine on your network (maybe you already have a Windows desktop or a management solution you want to connect to it from or even an existing VMware vCenter server).
In summary, running VMware vSphere as a virtual machine is a great idea for testing, learning, and demonstration purposes. It can be done completely free (at least for 30 days while you evaluate Fusion). You can also run Windows 2012 Hyper-V in Fusion, you can run vSphere in Workstation in Windows, or even vSphere inside a VM on an existing VMware vSphere server in your datacenter. Virtualization has created so many options! My goal is to always have an available virtual lab comprised of two VMware vSphere VMs, vCenter, and a shared storage VM, all in a "golden" configuration that I can "spin up" at any time for demonstration or testing (or blogging). In my opinion, every virtualization admin needs a virtual lab!


